To connect your existing domain from GoDaddy to your Savvy Site domain, you'll need to access the domain management panel provided by GoDaddy and configure the necessary settings. Here's a step-by-step guide to help you through this process.
Please note all codes shared with you are time sensitive and only active for 48hrs. Should your codes expire, the process will need to resume from the start. To avoid a frustrating experience for yourself we ask you please take action well before the 48hr window closes.
We highly recommend you simply email your hosting provider from the email account you’re registered with, and ask them to update these values for you. It’s the fastest and most stress-free way to do it.
https://ph.godaddy.com/help/contact-us
Step 1:
Go to your GoDaddy account.
Login with your private access details (please DO NOT share this information with us).
Navigate to ‘Domain’ on your left hand side control panel.
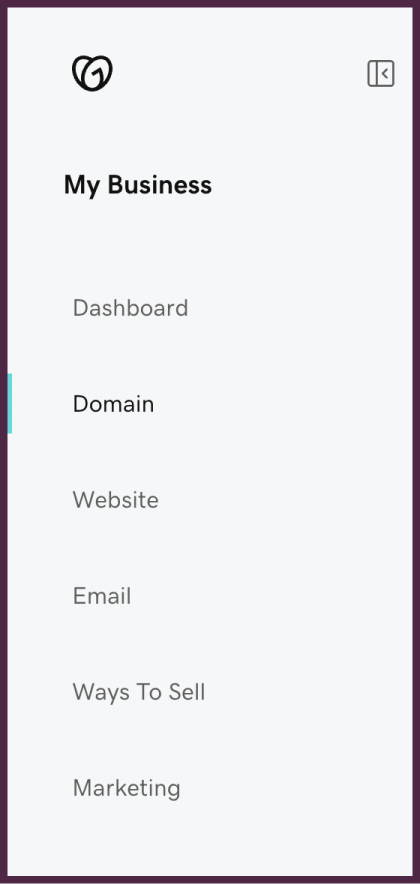
If you have one domain, it should be right there for you - in plain view.
If you have a more complex user profile with multiple domains, use the search feature to find the domain you would like to direct to your Savvy Site.
Select (click on) the domain. Select ‘Manage DNS’

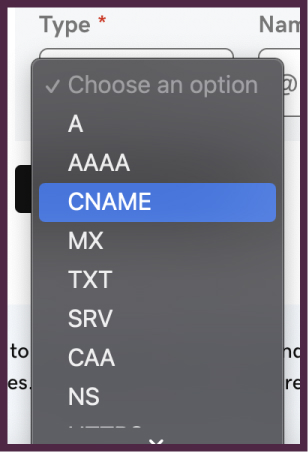
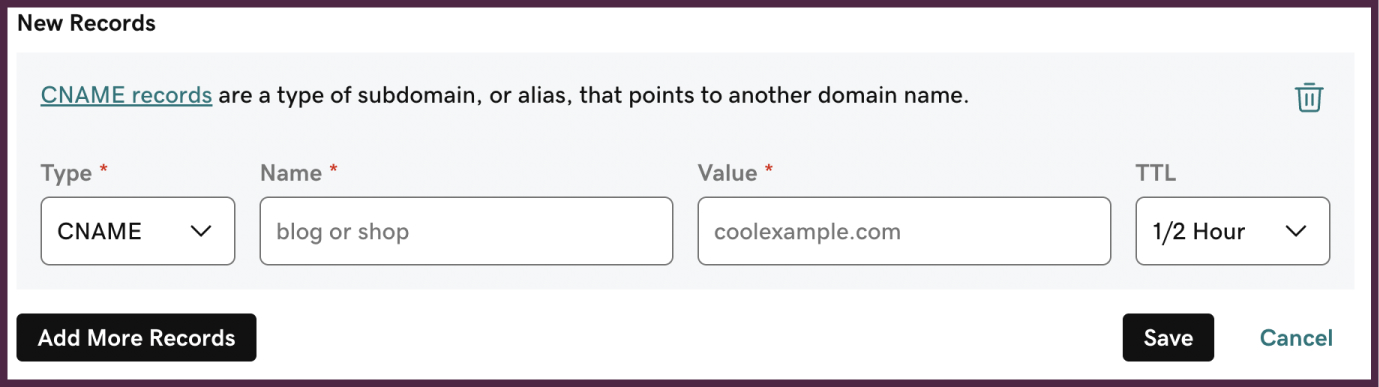
Select the black button that says ‘+ Add record’

The following card should appear, ready for you to input the relevant values we’ve shared with you.

Use the dropdown menu under ‘Type’ and select CNAME
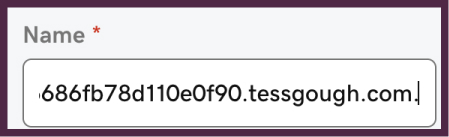
Add the first numeric value we shared with you into the ‘Name’ field. Please note, your numeric value will have the same format as the image below, but it won’t be the same number as pictured below.
Add the second numeric value we shared with you into the ‘Value’ field. Please note, your numeric value will have the same format as the image below, but it won’t be the same number as pictured below.

Click the black ‘Save’ button below the input fields.
Then it is our turn again 👏 We’ll do what we need to do to bring us to the 2nd step of connecting your domain. Please allow us up to 24hrs for this step. We will get back to you with a final set of values to be updated on your GoDaddy dashboard for the domain redirect to be complete.
Step 2:
Your domain redirect is almost complete. You need to make three final changes.
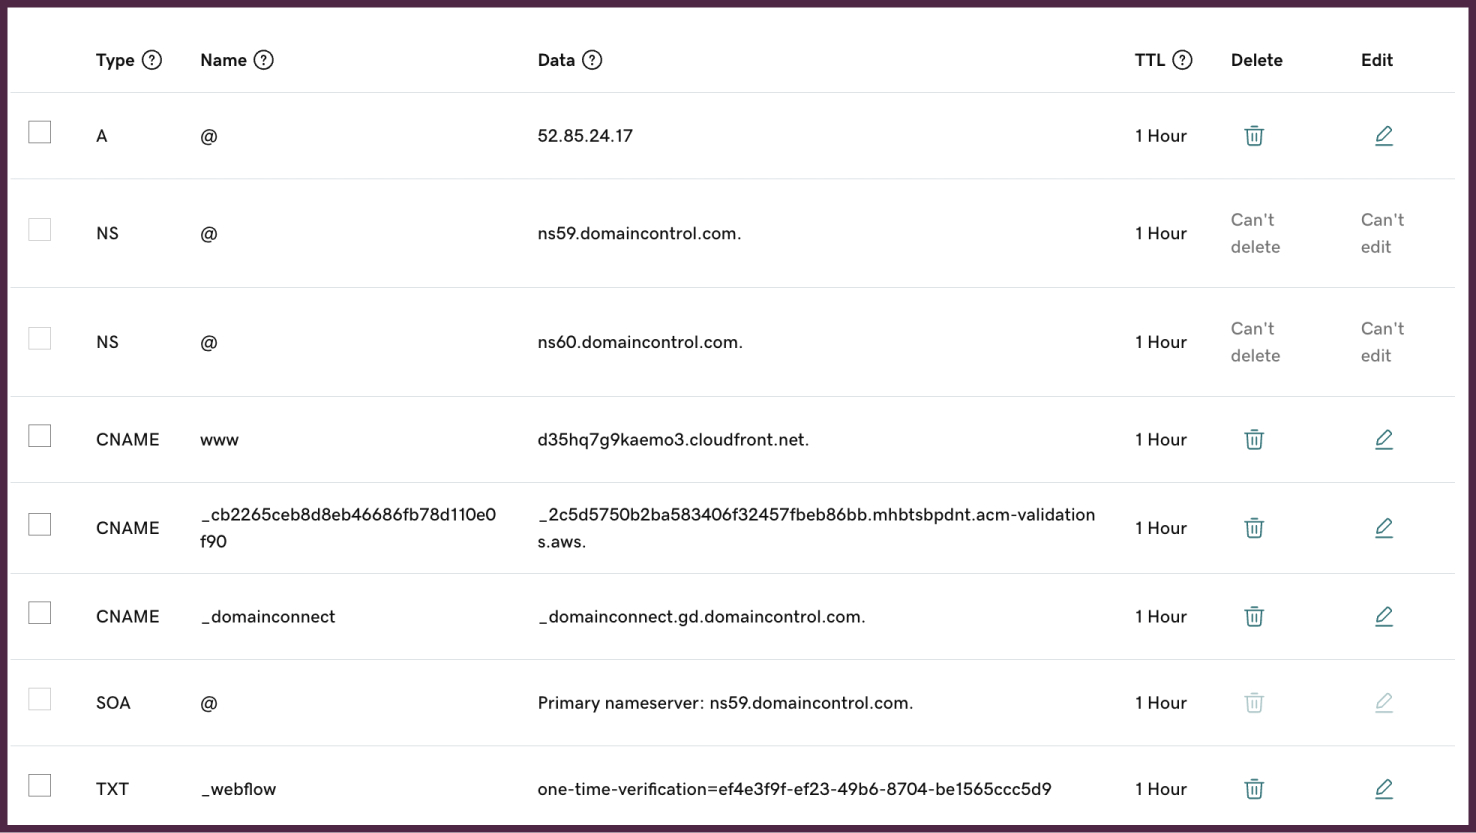
You’ll need to edit this ‘A type’ entry pictured below by selecting edit (pencil icon) on the right hand side (pictured in our screenshot). You’ll have the option to edit or delete. Select EDIT.

Edit the value field with the value we shared with you. It will have the same format as the number below. Click the black ‘save’ button.

Lastly, you will need to add another new CNAME record.
Select CNAME on the dropdown menu.
In the ‘Name’ field add www
In the ‘Value’’ field add the last code we’ve given you. (This is the value that ends with cloudfront.net.)
Your records for your domain will look something like the image below. PLEASE NOTE your values will NOT be the same since every website requires custom codes.
Propagation Time:
DNS changes may take some time to propagate across the internet. While some changes might be visible within minutes, it could take up to 24-48 hours for the pointing to fully propagate worldwide.
Test:
Enter your GoDaddy domain in a web browser and verify that it correctly points to your Savvy Site.